
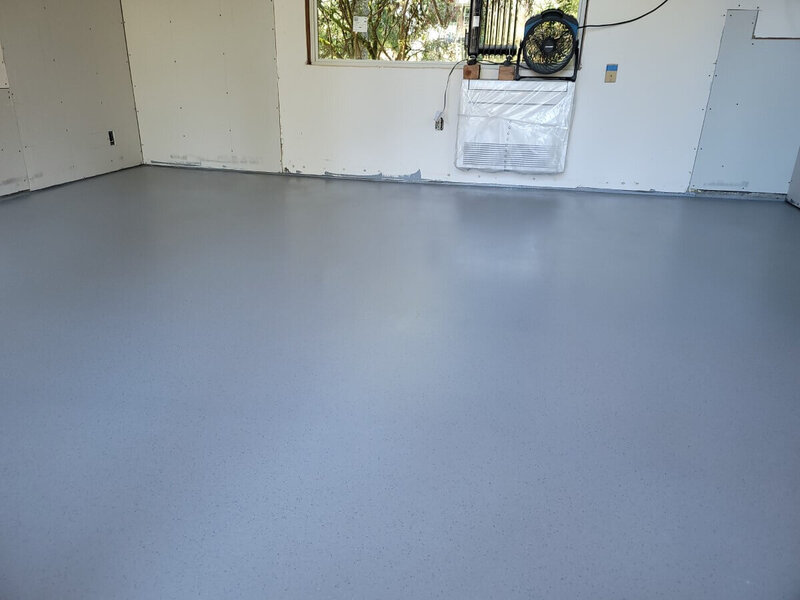
Can You Really Do It Yourself? Let’s Talk DIY Epoxy Garage Floors
Ever wondered how to epoxy garage floor surfaces without hiring a pro? With the rise in DIY culture and affordable epoxy kits, many homeowners are choosing to take matters into their own hands. A DIY epoxy garage floor not only boosts the appearance of your space but also protects it from stains, cracks, and everyday wear.
Still, many ask: Is it worth doing it yourself, or should you call in experts like Epoxy Tallahassee? This blog breaks down everything you need to know—from prep to product selection—to help you decide.
While the satisfaction of a DIY job well done is undeniable, it’s important to weigh the time, effort, and potential mistakes involved. DIY epoxy flooring can be rewarding, especially if you enjoy hands-on home improvement. However, for those who prioritize convenience and perfect results, hiring professionals might be the wiser route.
What Is a DIY Epoxy Garage Floor?
A do-it-yourself epoxy garage floor involves applying a coating of epoxy resin over concrete. DIY kits typically include the epoxy base, hardener, color flakes, rollers, and instructions. Once mixed and rolled onto the floor, epoxy creates a glossy, durable surface that resists moisture, chemicals, and impact.
Common benefits of epoxy garage floor DIY projects include:
- Budget-friendly installation
- Custom color and flake options
- A more polished and clean-looking garage
While it can save you money, DIY also means taking full responsibility for surface prep, application, and curing.
Step-by-Step Guide: How to Epoxy Your Garage Floor (DIY Style)
Here’s a simplified guide to help you coat your garage floor like a pro:
1. Clear and Clean the Area
Remove all items from the garage. Sweep and power wash the floor to eliminate debris, stains, and oil spots.
2. Etch or Grind the Concrete
For proper adhesion, the floor must be porous. Use a concrete etching solution or rent a grinder.
3. Repair Cracks and Holes
Fill in chips and cracks with a concrete patching compound. Allow adequate drying time.
4. Mix Your Epoxy Kit
Follow the instructions in your DIY epoxy garage floor kit. Most require mixing a resin base with a hardener.
5. Apply the Base Coat
Pour epoxy in ribbons across the floor and roll it out evenly in sections. Use a roller with an extension pole.
6. Add Color Flakes (Optional)
Sprinkle flakes while the epoxy is still wet. These add texture and hide imperfections.
7. Let It Cure
Drying takes 24–72 hours. Avoid walking or parking on it until fully cured.
What You’ll Need: DIY Garage Floor Epoxy Kit Essentials
Every reliable DIY garage floor epoxy kit should include:
- Epoxy resin and hardener
- Etching solution or grinder rental
- Squeegee or rollers
- Paintbrush for edges
- Non-slip additive (optional)
- Decorative color flakes (optional)
You can find kits at major hardware stores or specialty coating suppliers. Prices range from $100 to $300 for a standard two-car garage.
DIY vs Professional Epoxy Garage Floors: A Comparison
The table below offers a side-by-side look at the key differences between taking the DIY route and hiring a professional like Epoxy Tallahassee. While a diy garage floor epoxy project is more cost-effective upfront, it may fall short in areas like preparation, finish quality, and longevity. On the other hand, professional epoxy flooring involves advanced tools, skilled labor, and warranties that provide peace of mind. This comparison is designed to help you weigh the pros and cons so you can choose the option that best suits your goals, budget, and timeline.
Here’s how diy garage floor epoxy compares to professional application:
| Feature | DIY Epoxy Garage Floor | Professional Epoxy by Epoxy Tallahassee |
| Cost | $100–$500 | $1,200–$6,000 |
| Tools Provided | In kit | Commercial-grade equipment |
| Prep Work Quality | Varies (DIY) | Expert grinding and patching |
| Finish Quality | Moderate | Flawless and long-lasting |
| Warranty | None | Yes (Varies) |
| Time to Complete | 2–5 days | 1–2 days |
DIY may be more budget-friendly, but outcomes can vary depending on your preparation, experience level, and floor condition. For maximum durability and aesthetics, Epoxy Tallahassee offers guaranteed professional finishes.
Frequently Asked Questions (FAQ)
- Is a DIY epoxy garage floor worth it?
Yes, if you’re handy and willing to invest time. DIY can save you money and offer decent results, but it comes with risks like peeling or uneven surfaces. It’s a good learning experience for homeowners who enjoy hands-on projects. Just be prepared for some trial and error. For high-traffic garages, consider consulting a pro. - How long does a DIY garage epoxy floor last?
Typically 2–5 years, depending on traffic, prep quality, and maintenance. Professional jobs can last 10–20 years. Humidity, temperature, and surface prep significantly impact durability. Adding a sealant layer can extend its life. Regular cleaning and avoiding heavy impacts also help. - What’s the hardest part of doing it yourself?
Proper surface preparation is the most difficult. Failing to clean and etch the floor properly can lead to poor bonding. Grinding or etching requires effort and specific tools. Many DIY errors stem from skipping steps. Patience is crucial during each phase. - Can I use a DIY epoxy garage floor kit in high-humidity areas?
Yes, but you’ll need to monitor moisture levels and ensure the garage is well-ventilated during curing. Using a dehumidifier helps reduce the risk of bubbles. Always follow the manufacturer’s instructions. Applying in dry conditions ensures optimal adhesion. - How much does a DIY epoxy garage floor kit cost?
Kits range from $100 to $300, depending on brand and coverage. Premium kits with extra flakes and additives may cost more. Prices vary by retailer and region. Always compare what’s included in the kit. Cheaper kits may lack crucial components. - Do I need to seal over a DIY epoxy floor?
Not necessarily. Some kits include a topcoat; others don’t. Adding a sealant can extend the floor’s lifespan and add shine. A topcoat also improves resistance to UV and chemicals. Clear coats can enhance gloss and traction. Consider adding a sealant for enhanced durability and a more professional finish. - Can I park on my DIY epoxy floor?
Yes, but wait at least 72 hours for full curing. Lightweight vehicles may be safe after 48 hours. Avoid sharp turns or dragging heavy objects early on. Gradual use helps the coating settle. Always check curing times listed on the product label.
Final Thoughts: Is a DIY Epoxy Garage Floor Right for You?
Tackling a DIY epoxy garage floor can be a satisfying weekend project that enhances your space and saves money. With the right prep and product, you can achieve professional-looking results at a fraction of the cost. It’s also a great opportunity to personalize your space with custom color flakes and finishes that reflect your style. By doing it yourself, you gain control over the process and develop valuable hands-on experience with home improvement projects.
However, if you want guaranteed results, faster installation, and no room for error, consider hiring the pros. At Epoxy Tallahassee, we specialize in flawless epoxy installations using industrial-grade products and techniques.
Upgrade Your Space – Book Your Epoxy Flooring Service Today!
Contact Epoxy Tallahassee today to schedule a consultation and discover the best epoxy solution for your garage floor transformation.