
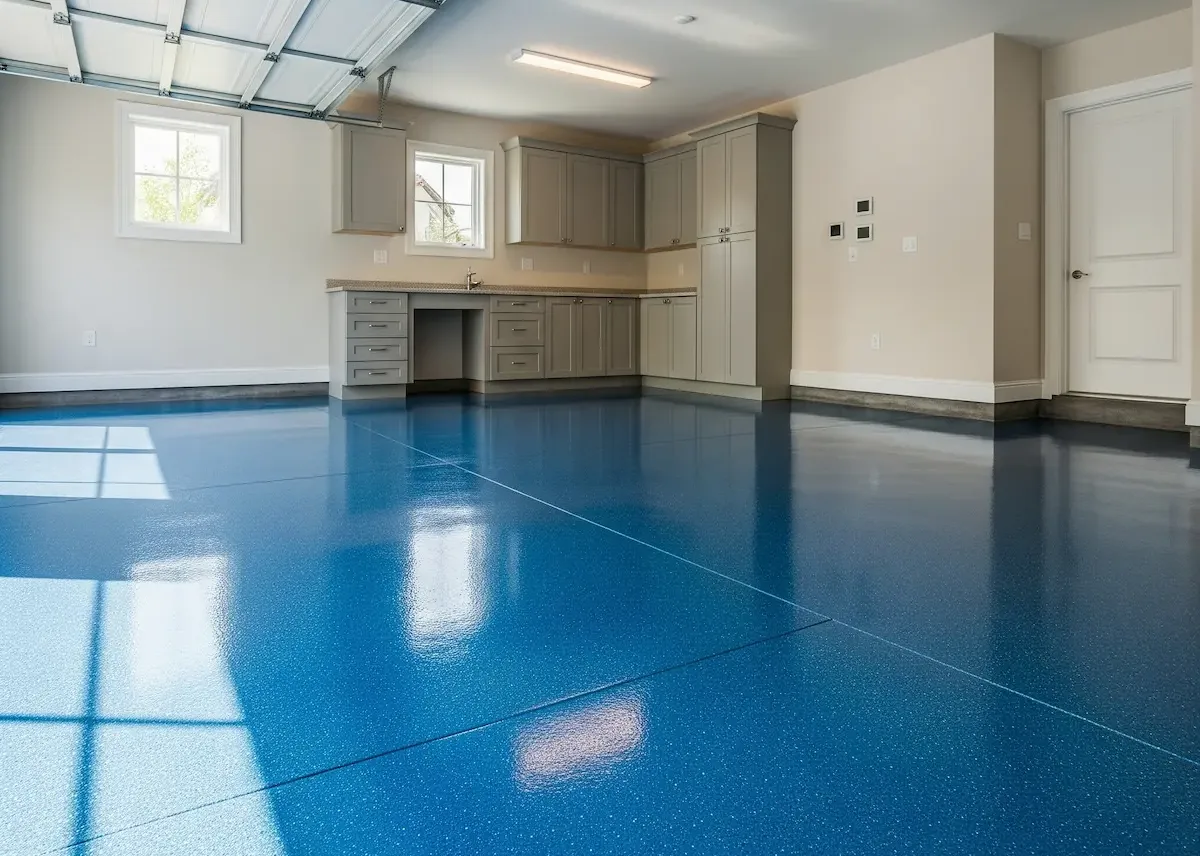
If you’re wondering how to epoxy a garage floor, you’re not alone. Epoxy flooring has become one of the most popular solutions for upgrading garage spaces due to its durability, appearance, and long-term value. Whether you’re a DIYer or hiring a pro, knowing the proper steps ensures a successful result.
This blog will guide you through every stage—from prep garage floor for epoxy to curing and sealing. We’ll also share local insights, brand recommendations, and frequently asked questions so you feel confident moving forward.
Why Epoxy? The Benefits of Epoxy Coating Garage Floor Systems
Epoxy coatings chemically bond to concrete, forming a tough, long-lasting barrier that resists moisture, chemicals, abrasions, and impact. Here’s why homeowners and commercial property managers love it:
-
Durability: Withstands hot tire pickup, oil spills, and tools
-
Low Maintenance: Easy to clean and doesn’t chip like paint
-
Custom Appearance: Wide range of colors, flakes, and finishes
-
Improved Safety: Anti-slip textures and improved lighting due to reflectivity
-
Moisture Protection: Seals out water—essential in humid climates like Tallahassee and Valdosta
Step-by-Step: How to Epoxy a Garage Floor
Successfully applying epoxy involves more than just brushing on paint. Follow these steps to epoxy garage floor surfaces like a pro:
-
Clear the Garage: Remove all items, sweep out debris, and inspect for stains or cracks.
-
Degrease & Clean Thoroughly: Use a degreaser and stiff-bristle broom to scrub away oil or residue.
-
Etch or Grind the Floor: This is a critical step to open the pores of the concrete so the epoxy adheres. Etching solutions or a floor grinder will do the job.
-
Repair Cracks or Pits: Use an epoxy patching compound to create a level surface.
-
Dry and Prep: Let the floor fully dry (at least 24–48 hours) before applying epoxy.
-
Mix Epoxy Properly: Follow the brand’s mixing instructions. You’ll typically combine resin and hardener and mix for a few minutes.
-
Apply the Base Coat: Use a roller in small sections, maintaining a wet edge.
-
Broadcast Color Flakes (Optional): Add flakes while the base coat is still wet to create a textured look.
-
Apply Topcoat: This seals the system and adds UV and chemical resistance.
Tip: Don’t skip prep—90% of epoxy floor failures come from poor surface preparation. Take the time to properly prep garage floor for epoxy and allow sufficient drying between coats.
Product Breakdown: Epoxy Kits vs. Professional Systems
Before you decide which type of epoxy application is right for your garage, it’s helpful to understand the options available. Whether you’re choosing a DIY kit for a weekend project or hiring professionals for high-performance finishes, knowing the differences in cost, durability, and ease of use can save you time and ensure long-term satisfaction. The table below breaks down your choices:
| Type | Durability | Ease of Application | Price Range | Best For |
| DIY Epoxy Kits | Moderate | Easy to Medium | $100–$300 | Homeowners, light usage |
| Professional Epoxy | Very High | Requires experience | $3–$12/sq. ft. | High-traffic or commercial |
| Polyurea Hybrid Coats | Very High | Fast-drying, advanced | $$$ | Professionals only |
DIY kits are perfect for learning how to epoxy your garage floor, while professional systems offer more advanced protection, especially for commercial or heavy-duty use.
Local Insight: Epoxy Success in Southern Environments
In North Florida and South Georgia, the climate brings high humidity and big temperature swings—two major threats to unsealed concrete. That’s why epoxy is so effective here. It locks out moisture, resists heat, and offers a bright, clean surface ideal for multipurpose garages.
Many homeowners in Tallahassee, Valdosta, and Thomasville have garages that double as storage, workshops, or even guest spaces, which makes long-lasting flooring a necessity. Epoxy not only improves functionality but also elevates the look of your garage, transforming it from a dull concrete box into a professional-grade environment.
At Epoxy Tallahassee, we’ve seen everything from garages turned into gyms in Bainbridge to showrooms in Thomasville. Our team knows how to apply epoxy to garage floor setups that stand up to local conditions, and we tailor every project to meet each client’s aesthetic and performance needs.
FAQs: Your Epoxy Floor Questions Answered
Q: How do I prep garage floor for epoxy coating?
A: Clear the space, clean it thoroughly, degrease, etch or grind the surface, and repair cracks. Dry it fully before applying epoxy. Also, ensure the temperature and humidity are within the recommended range. Using a moisture test kit can help prevent future issues.
Q: How long does epoxy flooring last?
A: With proper installation, epoxy can last 10–20 years in residential settings. Longevity depends on prep quality and wear level. Applying a protective topcoat can extend its life even further. Regular cleaning and avoiding abrasive materials help preserve the finish.
Q: Can I learn how to epoxy my garage floor and do it solo?
A: Yes. Many DIYers succeed with kits. Just don’t skip surface prep, and follow curing timelines. Read the manufacturer’s instructions carefully and wear proper safety gear. If in doubt, consult with a local expert to avoid costly mistakes.
Q: What’s the drying time between coats?
A: Most epoxy coats need 12–24 hours to dry before applying the next layer. Full cure can take up to 7 days. Avoid foot or vehicle traffic during this time. Keep ventilation steady to aid in the curing process.
Q: Is epoxy slippery when wet?
A: It can be. Use anti-slip additives or flakes to improve traction—especially in garages where water or oil is common. Textured finishes and matte topcoats offer safer surfaces. Proper lighting can also help prevent slip hazards.
Extending Lifespan & Enhancing Appearance with Epoxy
Aside from the practical benefits, epoxy offers visual versatility that few flooring systems can match. Whether you’re after a high-gloss showroom look, a subtle matte finish, or a flake-filled textured surface, epoxy can adapt to your aesthetic. Many homeowners use epoxy to coordinate with their vehicles, interior décor, or even school colors.
Epoxy’s reflective nature also boosts garage lighting without extra fixtures, making the space feel larger, cleaner, and more professional. This is especially helpful for garages that double as workshops or fitness zones. For added customization, metallic pigments or colored flakes can be mixed into the base coat for unique swirls, depth, and texture.
Don’t forget, proper maintenance also plays a role in longevity. Clean regularly with a soft-bristle broom or mop, avoid dragging sharp objects, and consider applying a refresher topcoat every 5–7 years for maximum durability. With minimal effort, your epoxy-coated garage floor can maintain its shine and strength for decades.
Final Thoughts: Transforming Your Garage with Epoxy
Learning how to epoxy a garage floor is a smart move for anyone looking to upgrade functionality and appearance. Whether you’re tackling it yourself or calling in professionals, following the correct steps to epoxy garage floor success is key. Properly applying epoxy to garage floor surfaces improves strength, prevents peeling, and ensures your floor performs well for years to come.
Remember, it all starts with prep. If you skip the crucial early phases—cleaning, drying, grinding—you risk bubbles, peeling, or poor adhesion. But when done right, epoxy offers long-term value, visual impact, and serious durability.
At Epoxy Tallahassee, we help homeowners and businesses in Tallahassee, Valdosta, Thomasville, and surrounding cities get it done right the first time.
Epoxy Flooring Made Easy – Contact Us to Book Now!