
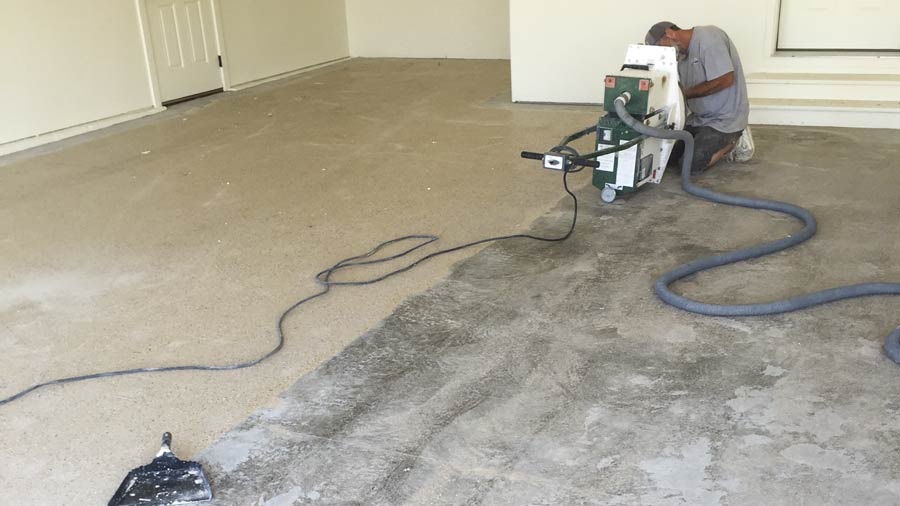
Epoxy garage floors are prized for their sleek appearance, resilience, and easy maintenance. However, over time, even the most durable coatings can develop chips, cracks, or areas of wear from daily vehicle traffic, dropped tools, or moisture exposure. Learning how to repair epoxy garage floor damage offers a cost-effective way to restore its original shine and strength without a full replacement. With proper maintenance, including cleaning and sealing, these floors can continue to perform and look great for years.
Understanding Epoxy Garage Floor Repairs
Repairing an epoxy garage floor involves addressing surface damage through methods such as patching chips, filling cracks, and recoating worn or discolored areas. These repairs are essential to maintaining both the structural and visual integrity of the floor.
Common causes of epoxy floor damage include heavy impact from dropped items, consistent pressure from vehicles, poor initial installation, and moisture intrusion. Understanding these causes is the first step in preventing future issues and ensuring repairs last.
When Repair Becomes Necessary
Several warning signs indicate that your epoxy garage floor may need repair:
- Peeling or Bubbling: Coating separates from the concrete, usually due to moisture or poor surface preparation.
- Discoloration: Stains from oil, chemicals, or UV exposure that dull the finish. Over time, fading or discoloration can make the garage look older and less maintained.
- Visible Cracks or Chips: Weak points that can spread and compromise the surface. If left untreated, these imperfections may worsen and allow further damage to the concrete below.
Neglecting these problems can lead to deeper concrete damage, requiring costly replacement. In cases of severe deterioration—such as widespread peeling or significant structural cracks—full replacement or a professional recoat may be the better option.
Benefits of Repairing Instead of Replacing
Opting for repairs instead of a full replacement provides several advantages:
- Lower Cost: Repairs are significantly more affordable than a new installation. This allows homeowners to allocate budget savings to other improvements.
- Extended Lifespan: Timely repairs prevent small problems from becoming major. By addressing issues early, the coating remains effective for many years.
- Maintained Property Value: A well-kept garage floor enhances overall home appeal. It also reassures potential buyers that the property has been properly maintained.
- Sustainable Solution: Repairing generates less waste compared to replacement. Choosing repair reduces landfill contributions and supports eco-friendly practices.
Step-by-Step: How to Repair Epoxy Garage Floor
Repairing an epoxy garage floor may seem complicated, but breaking it down into clear steps makes the process approachable and effective. By following the right order—preparing the surface, filling cracks, recoating, and sealing—you can achieve results that restore both function and aesthetics.
Surface Preparation
Start by cleaning epoxy garage floor surfaces thoroughly. Remove dirt, oil, and debris using a non-abrasive scrub brush and a gentle cleaner. Proper preparation ensures that repair materials bond securely.
Crack and Chip Filling
For minor cracks and chips, use epoxy patch kits or polymer-based fillers. Apply the material evenly, smoothing it flush with the surrounding surface.
Reapplying Epoxy Coating
Once repairs have cured, reapply an epoxy coating over the patched area. Feather the edges to blend with the surrounding finish, creating a uniform look.
Sealing the Floor
Finish by applying an epoxy garage floor sealer. This protective layer enhances durability, guards against chemicals, and preserves the restored appearance.
Cleaning & Maintenance for Lasting Repairs
Knowing how to clean epoxy garage floor surfaces after repairs is essential for preserving both their appearance and durability. Regular maintenance plays a key role in extending the life of your garage floor:
- Sweeping and Dusting: Remove dirt and grit frequently to prevent scratching. Regular sweeping also stops small particles from embedding into the coating.
- Mopping and Rinsing: Use warm water and mild detergents for deeper cleaning. Rinsing well prevents residue that can dull the finish.
- Best Way to Clean Epoxy Garage Floor: Stick to non-abrasive tools like soft mops and microfiber cloths. This keeps the glossy surface intact without risking scratches.
- Product Choice: The best cleaner for epoxy garage floor surfaces is a pH-neutral solution formulated for coated concrete.
- Avoid Harsh Chemicals: Steer clear of acidic or abrasive cleaners that can dull or damage the finish. Over time, these substances can weaken the protective coating and shorten the floor’s lifespan.
Establishing a routine cleaning schedule ensures that repairs remain intact, and the floor maintains its professional-grade shine.
Cost Breakdown of Repairs
Repair costs vary based on the size of the garage and extent of the damage:
- DIY Repairs: $50–$150, depending on materials and tools.
- Professional Spot Repair: $300–$700 for patching and recoating localized areas.
- Full Recoat/Overlay: $1,200–$3,000 for larger damage requiring resurfacing.
Professional cleaning and sealing services can add to costs but deliver long-lasting protection and reduced maintenance needs.
Who Benefits Most from Epoxy Garage Floor Repairs
Epoxy floor repairs serve a wide range of property owners:
- Homeowners: Those with minor chips or wear can restore their garage floors affordably.
- Property Managers: Keeping rental units presentable and safe.
- Car Enthusiasts: Protecting garage floors while showcasing vehicles.
- Businesses: Light industrial spaces or workshops benefit from safe, clean, and durable surfaces.
Garage Floor Repair Options
| Repair Method | Cost Range | Durability | Best For | Install Time |
| DIY Patch + Sealer | $50–$150 | Moderate | Small chips & cracks | 1–2 days |
| Professional Spot Repair | $300–$700 | High | Worn sections, bubbling, peeling | 1–2 days |
| Full Recoat/Overlay | $1,200–$3,000 | Very High | Large damage, faded finish | 2–4 days |
Take the Next Step for Your Garage Floor
For expert inspections, repairs, and sealing, trust Epoxy Tallahassee. Our team combines technical knowledge with local expertise to deliver garage floors that look flawless and stand the test of time. Contact us today for a professional consultation and long-lasting results.
Frequently Asked Questions
What’s the best way to clean epoxy garage floors before repairing?
Sweep the floor, then use a pH-neutral epoxy garage floor cleaner with warm water to remove oil and dirt. Avoid acidic or abrasive products.
Can I repair epoxy garage floor cracks myself?
Yes, minor cracks and chips can be patched with epoxy repair kits. Larger or spreading damage may require professional intervention.
How much does it cost to repair an epoxy garage floor?
Costs range from $50 for small DIY fixes to $3,000 for a full professional recoat. The extent of damage and chosen repair method determine final pricing.
Should I use an epoxy garage floor sealer after repairing?
Absolutely. A sealer locks in repairs, resists chemicals, and extends the overall lifespan of the coating. It also helps maintain the floor’s glossy finish for a cleaner look.
What’s the best cleaner for epoxy garage floors?
A mild, pH-neutral cleaner specifically designed for coated surfaces is best. These products clean effectively without damaging the epoxy finish.